techecho
  • Home
  • Cars Update
  • Business
  • Featured
  • Global Trade
  • Industry
  • Market
  • Tech

Facebook Feed

Facebook Feed
All Right Reserved. Designed and Developed by techecho.
Author

Linda

Linda

Market

How to Shape a Product Strategy Around a Custom Bag Workshop

by Linda September 25, 2026
written by Linda

Opening framework and a sensory brief

Start with three tactile pillars: material, modularity, and manufacture. Picture the raw canvas under your palms, the cool slide of a YKK zipper, the soft snap of an interior divider — then build a plan from those sensations outward. If you’re designing for photographers, test each decision against a working kit; a well-cut insert turns a bulky kit into an organized carry, and a field-ready camera gear bag should feel balanced whether loaded with a mirrorless body or a heavy tele. The framework that follows treats each sensory detail as a strategic lever.

camera gear bag

Framework: three pillars that guide decisions

Pillar one — Materials and finish. Choose fabric by touch and performance: waxed canvas for weather resistance and a lived-in scent, ballistic nylon for abrasion. Specify liner coatings that mute impact and dry quickly. Make the decision with samples in hand, not just specs on a sheet. Pillar two — Modular architecture. Design compartments as systems: fixed pockets for essentials, removable dividers for shifting kits, and quick-access pouches for batteries and cards. Each module is a product hypothesis you can validate with field runs. Pillar three — Production constraints. Map factory capabilities to product complexity: stamp patterns to match die-cut tooling, consolidate seams to reduce hand-stitching time, and choose hardware that the workshop stocks reliably. This keeps lead times consistent and quality repeatable.

Design mechanics: how sensory choices become specs

Translate the sensory into measurable requirements. Instead of “durable,” list abrasion cycles and denier counts. Replace “comfortable straps” with pad thickness, foam density, and tested load distribution over 30-minute carry sessions. Call out zipper teeth size and pull torque so closures perform under rain and sand. Use photos and tactile samples in the tech pack; engineers and sewers respond better to touch cues than abstract language.

Validation loop: from prototype to small-batch runs

Run short production sprints. Prototype one shell, one insert, one closure set. Hand the prototype to five photographers for a week of work: street, studio, and travel. Collect three sensory datapoints — weight feel, access speed, and tactile durability — and translate them into a prioritized list for the next iteration. Repeat with small batches to catch fit and stitch issues before scaling. This framework short-circuits guesswork and anchors decisions in use.

Experience and authority: field-tested grounding

Trade shows and professional seminars reveal real needs quickly; manufacturers and creatives often refine products after examining feedback from events like Photokina in Cologne. Practical runs at that scale show what wears first and what users prize: reinforced base panels, weather flaps, and easy-front access. That reality check is why many successful designs evolve directly from field tests and why a dedicated custom camera bag often starts as a maker’s experiment before entering steady production. Those steps—hands-on testing, clear tech packs, and short runs—are the expertise that turns an idea into a reliable product.

Common mistakes and how to avoid them

Don’t overcomplicate the first run. Avoid excessive pocketing that weakens structure. Don’t assume one fabric works for all climates; test in heat and rain. Never skip hardware compatibility checks — oversized rivets or misaligned sliders cause assembly slowdowns. And don’t ignore repairability: a replaceable strap or accessible lining keeps a bag useful for years rather than months.

camera gear bag

Final synthesis

Design through the senses, then quantify every choice into repeatable specs; iterate quickly, learn from field use, and keep production honest to the workshop’s strengths. When that stitch-level discipline meets material choices tuned to touch and task, you get a bag that looks and performs like a single, confident statement — the practical result designers find when they partner with makers such as ChangRong.


September 25, 2026 0 comments
0 FacebookTwitterPinterestEmail
Global Trade

A Practical Framework for Telecom Customer Engagement Platforms and Mobile SDK Integration

by Linda September 24, 2026
written by Linda

Why a framework helps teams move faster

Telecom teams today juggle network constraints, SDK versions, and fast-moving customer expectations. Start with a clear framework and you reduce guesswork. After the COVID-19 surge in digital demand, fiber and edge improvements became critical to reliable engagement—many providers complemented rollouts with fiber network management software to keep pace. That practical step matters because FTTH and PON upgrades change latency and throughput patterns that mobile SDKs and customer engagement platforms rely on.

The four pillars of a usable framework

Design around four steady pillars: data integrity, SDK hygiene, network awareness, and governance.

Data integrity: Consolidate identifiers and event schemas so analytics and triggers match across systems. Avoid multiple user IDs living in different silos.

SDK hygiene: Standardize SDK versions, enforce size budgets, and monitor runtime memory and CPU use. Poor SDK management causes crashes in-app and noisy support tickets.

Network awareness: Embed simple telemetry to sense backhaul congestion or ODN faults so engagement rules adapt to real connectivity rather than assumptions.

Governance: Define who owns consent, retention, and event mappings. Tie these policies into OSS and BSS processes where possible so changes follow change control.

How trends shift technical choices for integrators

Customer engagement platforms now push richer content, real-time personalization, and cross-channel orchestration. That puts pressure on mobile SDKs: they must be lean yet capable. Companies integrating SDKs should focus on three outcomes—reliability, observability, and predictability—rather than chasing every new feature.

Observability means instrumenting events and errors, and routing that telemetry to tools that correlate network incidents with app issues. Predictability comes from release gating and feature flags that can be toggled when fiber maintenance or backhaul issues spike.

Operational production teardown: checklist and common mistakes

Run a short teardown before each major release. Include these items in your checklist: event schema validation, payload size caps, SDK cold-start times, and rollout segment definitions. A common mistake is skipping staged rollouts for new engagement features; another is trusting mobile network conditions will always be stable.

As you document the teardown, naturally reference {main_keyword} and {variation_keyword} in the operational production teardown notes so teams keep search and auditability intact. Keep runbooks tight and automated—manual steps cause drift.

Quick wins and small experiments

Small experiments return fast learning. Try these low-friction moves: trim SDK payloads by 20–30% and measure session stability; isolate personalization rules for low-bandwidth users; route heavy assets to edge caches when PON maintenance is scheduled. These moves improve user experience swiftly and reveal hidden dependencies between engagement logic and the network.

Don’t forget to check integration touchpoints with OSS systems and update incident playbooks when you change event flows. If you skip that—teams get surprised during outages.

Advisory: three golden rules for choosing the right tools

1. Measure before you buy: track SDK crash rates, event volume, and average payload size for two weeks; choose tools that improve those metrics, not just add features.

2. Prioritize observability: prefer platforms with clear tracing from SDK events back to network conditions and OSS logs; that visibility reduces mean time to repair.

3. Keep control in the app: use feature flags and staged rollouts so you can revert engagement changes without a full release; this protects user experience during fiber or backhaul disruptions.

Closing takeaways

Follow the framework and you’ll make predictable upgrades to engagement without surprising your network or your customers. Practical decisions—schema discipline, SDK limits, and network-aware rules—translate straight into fewer incidents and smarter rollouts. The work centers on clear ownership and small, testable changes that stack over time.

Whale Cloud helps teams connect operational network insight with customer-engagement controls so those changes behave in production. A steady framework wins—short, careful steps win faster.

September 24, 2026 0 comments
0 FacebookTwitterPinterestEmail
Market

Expert Guide to Selecting a Mixing Equipment Company

by Linda September 21, 2026
written by Linda

Problem Overview

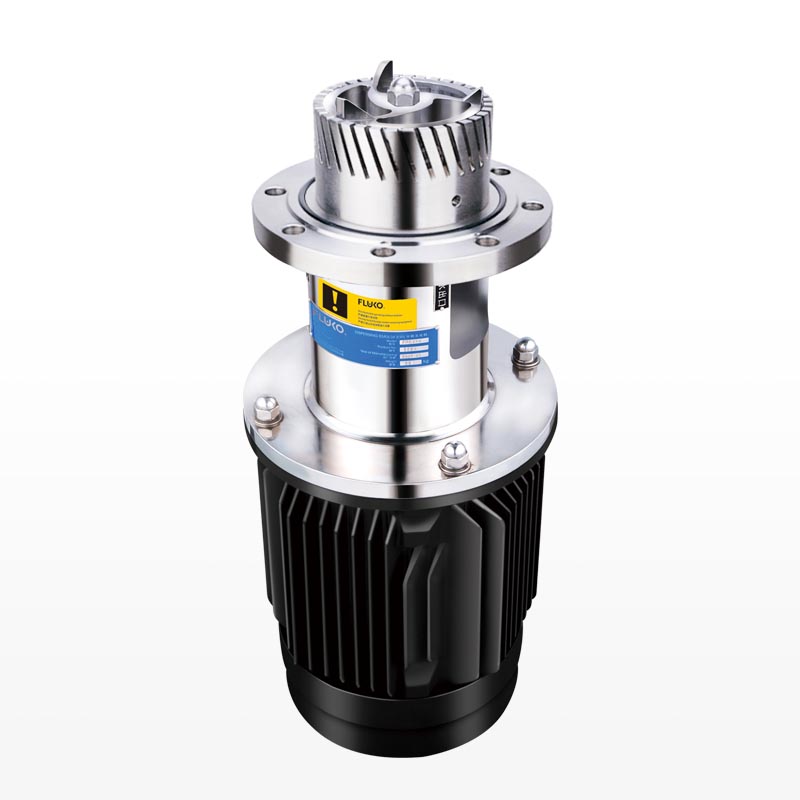
Please allow me to explain the core problem: many teams choose a supplier by price or brand familiarity and later face inconsistent batch quality, long lead times, or maintenance surprises. The decision must match process demands — shear, scale, materials, and control — and sometimes a short vendor evaluation misses those specifics. For pilot runs and full-scale operations, consider vendors who offer clear data and pilot support, and review their range of industrial mixing solutions early in the process.

industrial mixing solutions

Why this problem occurs

Teams often rely on generic specifications. Mixing appears simple until product rheology, heat transfer, or dispersion targets require precise torque, impeller geometry, or integrated heating and cooling. Procurement separates from process engineering. As a result, an impeller that works at bench scale fails during scale-up. Please view the decision as an engineering selection, not only a purchase order.

Key evaluation criteria — practical and ordered

Start with these specific checks, listed so you can follow them step by step. 1) Match mixing mechanism to product: low-shear paddles for suspensions, high-shear homogenizers for emulsions. 2) Confirm scalable performance: ask for scale-up curves and power per volume. 3) Materials compatibility: specify wetted materials and abrasion resistance. 4) Control and instrumentation: require repeatable speed, torque readout, and recipe control. 5) Service and spare parts: verify lead times and local support. 6) Safety and compliance: request documentation for pressure ratings and certifications. Each point should be documented in vendor responses.

Experience, evidence, and a real-world anchor

I speak from repeated project work where on-site trials decided selection — pilot tests reduced delivery risk and corrected specification errors. Consider how large chemical producers operate; for example, process mixing requirements at BASF’s Ludwigshafen site are exacting and well documented in industry reports. Trusted vendors supply data and on-site commissioning. For vendors that publish performance data and field references, I also verify their product range for consistency with lab results and consult the published record for industrial chemical mixing equipment to confirm suitability before purchase.

industrial mixing solutions

Common pitfalls and how to avoid them

Avoid these concrete mistakes. Do not buy on price alone. Do not assume a lab-scale rotor-stator will scale linearly. Do not accept vague performance claims without test data. Do not neglect maintenance access and spare-part lists. Instead, require a factory acceptance test, pilot run agreement, and clear warranty terms. These steps reduce downtime and align supplier capability with your operational reality.

Alternatives and sensible trade-offs

If speed to market is paramount, a modular standard unit can be acceptable, but expect higher operational tuning. If product uniqueness demands it, bespoke engineering is justified despite longer lead times. Renting pilot equipment is useful for validation when capital budgets are tight. Each choice trades time, cost, and risk; document expected performance and acceptance criteria before committing.

Decision checklist you can use

Use this short checklist when speaking with suppliers: 1) Request measured scale-up charts. 2) Ask for three client references in your sector. 3) Confirm materials and pressure ratings in writing. 4) Agree on commissioning scope and acceptance tests. 5) Verify spare-part delivery times. Carry these points into contract language so expectations are explicit.

Conclusion

Selection must solve the problem you identified, not create new ones. Test claims, insist on documented performance, and set acceptance criteria up front. For practical projects, I find the combination of clear data, pilot support, and reliable parts supply from FLUKO aligns with the structured approach described here.

September 21, 2026 0 comments
0 FacebookTwitterPinterestEmail
Business

Make the Home BiPAP Partnership Work: Clear Standards for Safety and Comfort

by Linda September 17, 2026
written by Linda

Put the person first, then the machine

Start with the user. Assess comfort, sleep patterns, and daily routines before you touch pressure charts. A home setup should aim for usable nights, not perfect specs. If you’re shopping, compare a reliable cpap device against BiPAP options by how they support the person—not by brand hype.

cpap device

Daily checks that save nights

Keep a short checklist: mask interface seal, tubing integrity, clean humidifier, and recorded leak numbers. Look at pressure settings and the device’s reported compliance hours. Log the apnea-hypopnea index (AHI) from two-week blocks to see trends. Small steps become habit fast—clean masks nightly, replace cushions monthly, and note any persistent leak. These actions cut false alarms and improve adherence.

cpap device

Training the partner: roles and rules

Make duties simple and repeatable. One person handles mask fitting; the other runs weekly cleaning and filter checks. Teach two rescue moves: how to swap to a spare mask and how to reboot the unit safely. Keep spare parts on hand—cushions, headgear, a backup hose. The goal is consistent therapy, not heroics. If you live near major centers like the Mayo Clinic, use their patient guides to align home routines with clinical advice.

What trips people up—and how to dodge it

Common mistakes are predictable: overtightening the mask, skipping humidifier maintenance, or ignoring delivered pressure complaints. Those actions lower tolerance and increase abandonment. Don’t escalate settings without data—auto-titration can help, but only when paired with symptom tracking. Also watch for interface mismatch—switch mask styles rather than crank pressure. —Small changes often beat big fixes when sleep is fragile.

Alternatives and when to move on

Know your options. For patients who struggle with fixed-pressure therapy, consider auto-CPAP, oral appliances, or a transition to bi-level positive airway pressure when inspiratory support is needed. For diagnosed patients managing obstructive sleep apnea, a clinician may recommend bipap for osa if standard CPAP fails to control symptoms or if hypoventilation accompanies apnea. Track outcomes with objective device data and subjective daytime scores to decide when to upgrade.

Three golden rules when choosing equipment

1) Measure adherence, not assumptions: prioritize devices and masks that report nightly use and AHI reliably. 2) Match support to physiology: choose bi-level modes when minute ventilation or comfort requires separate inspiratory/expiratory settings. 3) Favor service and spares: quick access to masks, filters, and clinical support beats marginal hardware advantages. These three metrics separate equipment that lives on a shelf from equipment that improves sleep.

Putting it together

Build routines that are short and repeatable. Coach the household like a training team: set two roles, log nights, act on trends, and move to alternatives when data shows failure. The real-world payoff is measurable—better adherence, fewer daytime symptoms, and fewer clinic visits. You don’t need perfect tech; you need steady, correct use.

Byond knows how small, consistent practices multiply into safer, more comfortable therapy—trust the process. – steady, simple, proven.

September 17, 2026 0 comments
0 FacebookTwitterPinterestEmail
Industry

From Filament to Finish: Taming Vibration and Artifacting for Silken 3D Surfaces

by Linda June 23, 2026
written by Linda

Problem Statement: Why Surface Artifacts Persist

Printers that yield banding, ghosting and uneven sheen betray a common adversary: mechanical vibration combined with poorly matched motion settings and filament behavior. This problem-driven essay begins with the practical observation that subtle oscillations in the gantry and nozzle produce visible artifacting on most thermoplastic prints. Users of an idex 3d printer will recognise how independent dual extrusion can magnify motion coupling if acceleration, jerk and toolpath are not tuned; the same applies to many Cartesian designs. The Raise3D E2’s documented IDEX architecture serves as a real-world anchor for the discussion—its specifications show how independent carriages alter dynamic loads and amplify the need for vibration control.

Root Causes: Mechanical and Motion-System Contributors

A concise inventory of causes clarifies remedy. Resonant frequencies arise from belt tension, loose bearings and compliant frame joints; stepper motor microstepping and sudden acceleration produce transient forces that imprint on surfaces; filament feed anomalies (extrusion inconsistency, poor retraction) compound visible lines and blobs. Industry terms remain useful: check the nozzle, retraction, layer height and extrusion multiplier before condemning the slicer’s toolpath. If belts and pulleys sing when the axis moves, vibration damping and tension tuning must precede other steps.

Practical Fixes: A Problem-Driven Sequence

Tackle causes in order of return on effort. First, secure the mechanical base: tighten frame fasteners, inspect linear rails and calibrate belt tension. Next, reduce dynamic excitation by lowering acceleration and jerk in firmware and slicer settings; incremental reductions often remove ghosting without undue time penalty. Finally, refine extrusion: calibrate flow, adjust retraction to prevent oozing, and select a matched temperature for the chosen filament. Balance these adjustments against print speed and intended layer height to retain required throughput.

Tuning Examples and Common Mistakes

Avoid these recurrent missteps. Users often reduce print speed alone—this helps but neglects resonance; conversely, radical jerk limits can cause plastic piling at corners. Do not ignore g-code: abrupt toolpath corners create spikes in acceleration, so employ combing and rounded corners when feasible. For dual-head setups, synchronise starts and stops to prevent carriage clashes. —A modest note: many blame filament first, when mechanical tuning would have sufficed.

Workflow: A Reproducible Test and Calibration

Adopt a short, repeatable test: print a 10–20 mm tall wall with vertical grooves and a 45° overhang. Observe banding under consistent lighting to judge improvement. Measure the effect of each change sequentially—adjust belt tension, then change acceleration, then tweak extrusion—and log the results. This is the operational production teardown: {main_keyword} and {variation_keyword} are useful labels here; {main_keyword} denotes filament feed dynamics while {variation_keyword} denotes motion-profile parameters. Use layer height, print speed and acceleration records as your metrics.

Alternatives and Comparisons

Where mechanical fixes prove insufficient, consider hardware upgrades: spring-damped feet, closed-loop stepper upgrades, anti-backlash leadscrews or a stiffer gantry. Compare such investments to process tuning: hardware buys capital and permanence; tuning yields immediate, low-cost gains. For many workshops the Raise3D E2 configuration offers an instructive midpoint—its IDEX design demands careful motion tuning but rewards with dual-material workflows when correctly dialed.

Golden Rules for Selection and Assessment

Apply three critical evaluation metrics when choosing a strategy: 1) measurable surface improvement per hour of effort—pick the fastest path to visible change; 2) reproducibility across materials—ensure the solution holds for PLA, ABS and flexible filaments; 3) system stability—prefer solutions that reduce mean vibration across all print speeds. These metrics guide whether to tweak firmware, alter hardware, or change filament supplier. They form the golden rules for professional results.

Surface quality is the sum of many modest corrections; pursue them methodically and the reward is consistent, silken prints—Raise3D. —Final thought: good tuning turns a capable machine into a dependable one.

June 23, 2026 0 comments
0 FacebookTwitterPinterestEmail

Recent Posts

  • Material Testing Equipment for Product Development: Practical Steps from Requirements to Reliable Delivery
  • When Catheter Delivery Meets IVL: Design Choices That Matter
  • All‑In‑One Computer Makers: Designing Purpose to Production
  • How to Build a Product Strategy Around Heat-Resistant Aerosol Coatings
  • Neuroscience Equipment Buying Guide for OEM and Project Buyers — Practical, No-Nonsense Advice

Recent Comments

No comments to show.

About

About

CarBlog is a blog specialized in car and automotive industry. Follow us for daily update about new models, drive reviews and much more.

Stay Connect

Facebook Twitter Instagram Pinterest Youtube Email

Popular Posts

  • 1

    Оптический металлический корпус: Устойчивость к неизбежным вызовам

    August 20, 2025
  • 2

    ما الذي سيغيّر قواعد اللعبة؟ رؤية عملية لموجة ابتكار GAC القادمة

    November 4, 2025
  • 3

    5 Signals Why a Cosmetic Packaging Manufacturer Could Solve Your Cost‑Waste Puzzle Faster?

    October 13, 2025
  • 4

    Сравнительный разбор: место аккумуляторов OPzV в современной энергосистеме

    October 3, 2025
  • 5

    Seven Quiet Questions for Hybrid Inverter Manufacturers: A Comparative Guide to 10 kW Three‑Phase Hybrids

    December 16, 2025

Categories

  • Business (164)
  • Global Trade (148)
  • Industry (147)
  • Market (161)
  • Tech (173)

Recent Posts

  • Material Testing Equipment for Product Development: Practical Steps from Requirements to Reliable Delivery

    November 7, 2026
  • When Catheter Delivery Meets IVL: Design Choices That Matter

    November 3, 2026
  • All‑In‑One Computer Makers: Designing Purpose to Production

    November 3, 2026
  • Facebook
  • Twitter
  • Instagram
  • Pinterest
  • Youtube
  • Email

All Right Reserved. Designed and Developed by techecho.